Shira Route Kilimanjaro
The Short Western Summit
The Shira Route is a shorter western approach to Kilimanjaro's summit that follows the same spectacular trail as the Lemosho Route — minus the first day's rainforest trek. Starting at Morum Barrier (3,414 m / 11,200 ft), you drive past the lower-elevation forest and begin your climb directly on the moorland-covered slopes of the Shira Plateau. From Shira 2 Camp onward, the route is identical to Lemosho: the same camps, the same southern circuit, and the same breathtaking scenery all the way to Uhuru Peak.
This makes the Shira Route ideal for climbers who want the full Lemosho experience in one fewer day. You still cross the vast Shira Plateau, ascend to Lava Tower for acclimatization, scramble up the famous Barranco Wall, and traverse beneath Kilimanjaro's southern glaciers — the route simply skips the lower-altitude rainforest to save time.
The trade-off is clear: while the route provides excellent acclimatization and access to all of Lemosho's most beautiful scenery, guests do miss the montane rainforest of Lemosho's first day — the dense canopy, colobus monkeys, and tropical birdlife that make that initial trek through the forest so memorable. If time permits, the full Lemosho Route remains our top recommendation. But for climbers with tighter schedules, the Shira Route delivers an outstanding summit experience.
The 7-day itinerary covers approximately 56 km (35 miles) and includes strong acclimatization through the "climb high, sleep low" strategy at Lava Tower, followed by a gradual build along the southern circuit to Barafu high camp.
IN THIS GUIDE
Shira Route | Day-by-Day Itinerary | Route Summary | Pricing | FAQ
A Shorter Western Summit via the Lemosho Trail
The Shira Route joins the Lemosho trail at Shira 1 Camp and follows the exact same path to the summit — the Shira Plateau, Lava Tower, Barranco Wall, Karanga Valley, and the southern glaciers. You experience all the beauty and acclimatization benefits of Kilimanjaro's most scenic route, compressed into one fewer day.
The trade-off: by starting at Morum Barrier (3,414 m) instead of the Lemosho trailhead (2,380 m), you skip the montane rainforest of Lemosho's first day — the dense canopy, colobus monkeys, blue monkeys, and tropical birdlife. If time allows, we recommend the full 8-day Lemosho Route for the complete experience. But for climbers with limited schedules, the Shira Route is a strong alternative that sacrifices very little.
Kilimanjaro's Ecological Zones on the Shira Route
Because the Shira Route starts at Morum Barrier (3,414 m), you begin above the montane rainforest and enter the mountain in the heath and moorland zone. From there, the route passes through four of Kilimanjaro's five ecological zones on its way to the Arctic summit. The descent via Mweka takes you back through the rainforest — so you do experience the forest, just on the way down rather than the way up.
| Zone | Elevation Range | What You'll Experience |
|---|---|---|
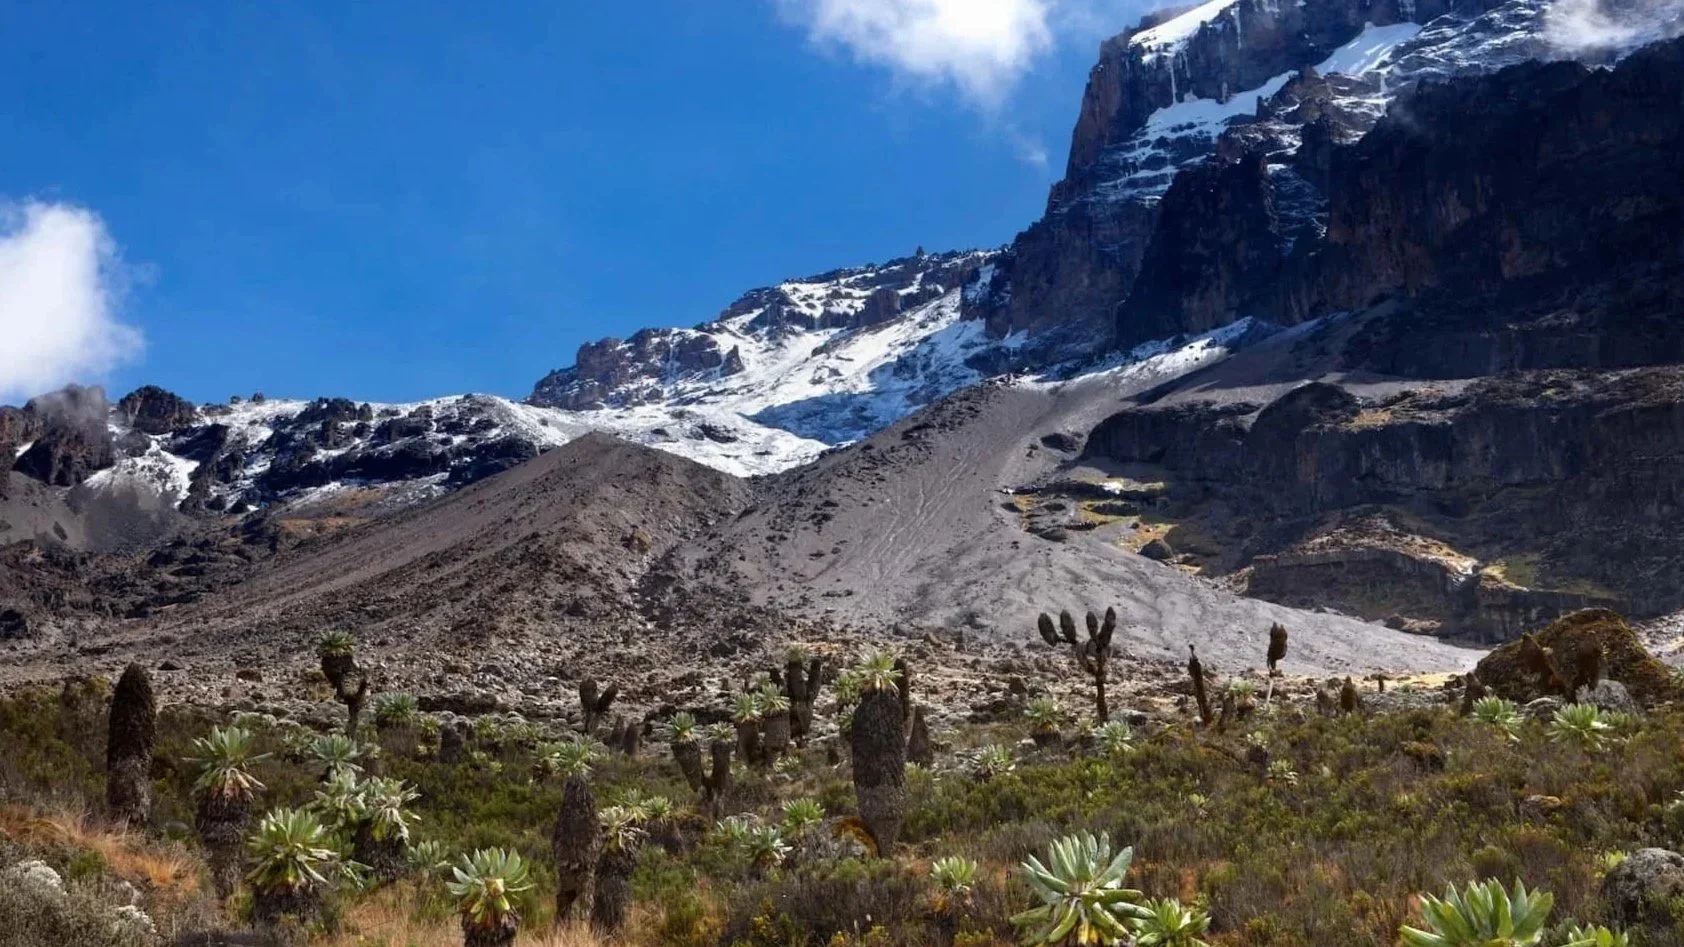
| Heath & Moorland | 3,414 m – 4,000 m | Your starting zone. Giant heather, wild grasses, and volcanic rock formations across the Shira Plateau. Panoramic views of Kibo's summit cone and Mount Meru. Shira Cathedral — a massive rock buttress — is a highlight of Day 2. |
| Alpine Desert | 4,000 m – 5,000 m | Sparse, rocky terrain with the iconic Lava Tower (4,630 m), the Barranco Wall scramble, and the southern glacier views from Karanga to Barafu. Extreme temperature swings between day and night. Virtually no vegetation. |
| Arctic / Summit Zone | 5,000 m – 5,895 m | Glaciers, scree, and snowfields. The midnight summit push from Barafu crosses steep switchbacks to Stella Point (5,752 m), then a crater rim traverse to Uhuru Peak (5,895 m). Wind, cold, and low oxygen define this zone. |
| Montane Rainforest (descent) | 1,640 m – 3,068 m | Experienced on the Mweka descent route. Dense tropical forest, mossy trees, and birdsong. The trail can be muddy and slippery — a dramatic contrast to the barren summit zone you left hours earlier. |
Shira Day-by-Day Itinerary
The 7-day Shira itinerary begins with a drive to Morum Barrier on Kilimanjaro's western slopes, then follows the Shira Plateau before merging with the Lemosho Route's southern circuit. Two nights on the plateau allow for gradual acclimatization before the route climbs toward Lava Tower, the Barranco Wall, and ultimately Uhuru Peak.
A 6-day Shira climb is also possible — this shorter option skips the first night at Shira 1 Camp and heads directly to Shira 2 Camp on Day 1, saving a day on the mountain. While it still follows the same scenic southern circuit to the summit, the 7-day version is recommended for better acclimatization.
-
3,414 m to 3,505 m • 4 km • 2 hours • Heath & Moorland
Your day begins with a drive from Moshi or Arusha to Londorossi Gate, where you register with Kilimanjaro National Park. From Londorossi, you continue by vehicle along a rough 4x4 track through the rainforest — the forest you would otherwise trek through on the Lemosho Route — up to Morum Barrier at 3,414 m. This is where the walking begins. The short afternoon trek crosses open moorland dotted with giant heather and wild grasses, arriving at Shira 1 Camp after about two hours. The gentle start gives your body time to adjust to the higher-than-normal starting altitude.
Overnight: Shira 1 Camp — 3,505 m / 11,499 ft
-
3,505 m to 3,847 m • 6 km • 4–5 hours • Moorland
A full day crossing the Shira Plateau — one of the most beautiful and unique landscapes on Kilimanjaro. The trail passes volcanic rock formations, sweeping grasslands, and the imposing Shira Cathedral, a massive buttress of rock that is one of the mountain's three volcanic cones. On clear days, the views stretch across to Mount Meru and the Kibo summit cone towers directly ahead. You arrive at Shira 2 Camp (3,847 m), where the Shira Route merges with the Lemosho trail. From this point onward, your path is identical to the Lemosho Route.
Overnight: Shira 2 Camp — 3,847 m / 12,621 ft
-
3,847 m to 4,630 m to 3,976 m • 11 km • 6–8 hours • Alpine Desert
The key acclimatization day. The trail climbs steadily from Shira 2 across increasingly barren alpine desert to the iconic Lava Tower (4,630 m / 15,190 ft), a volcanic rock formation that marks the highest point before summit night. This is a classic "climb high, sleep low" day — after reaching Lava Tower, you descend over 650 m to Barranco Camp (3,976 m) in the valley below. The descent is steep but scenic, passing through a landscape of giant groundsels and dramatic glacier views. Barranco Camp sits at the base of the famous Barranco Wall, which you'll climb tomorrow.
Overnight: Barranco Camp — 3,976 m / 13,044 ft
-
3,976 m to 4,034 m • 5 km • 4–5 hours • Alpine Desert
The morning begins with the Barranco Wall — a steep 257 m rock scramble that is the most dramatic section of the southern circuit. It looks intimidating from below, but the route is non-technical: hands and feet on rock, no ropes required. The reward at the top is a sweeping panoramic view of the southern ice fields and the Kibo summit dome. From there, the trail undulates through a series of ridges and valleys before dropping into the Karanga Valley and ascending to Karanga Camp. This is a relatively short day, allowing extra time for rest and hydration.
Overnight: Karanga Camp — 4,034 m / 13,232 ft
-
4,034 m to 4,673 m • 4 km • 4–5 hours • Alpine Desert
A short but steep climb to Barafu Camp, your high camp and summit launch point. The terrain is rocky and exposed, with the Rebmann, Kersten, and Decken glaciers visible on the slopes above. Barafu (meaning "ice" in Swahili) sits on an exposed ridge at 4,673 m — there is no shelter from wind, so layers are essential. Your team sets up camp and serves an early dinner. Your guide will brief you on the summit push schedule: wake-up at midnight, departure around 12:30 AM. Try to rest — tomorrow is the biggest day of the climb.
Overnight: Barafu Camp — 4,673 m / 15,331 ft
-
4,673 m to 5,895 m to 3,068 m • 15.5 km • 12–15 hours • Arctic / Moorland
The defining day. You wake at midnight and begin the summit push by headlamp. The trail climbs steeply through loose scree and gravel in total darkness, with temperatures often plunging to −15°C to −20°C with windchill. After 6–8 hours of steady, slow ascent (pole pole), you reach Stella Point (5,752 m) on the crater rim — often just as the sun rises over Mawenzi. From Stella Point, a 45-minute traverse across the snowfield brings you to Uhuru Peak (5,895 m / 19,341 ft), the roof of Africa. After summit photos, you descend back to Barafu for a brief rest and meal, then continue down to Mweka Camp (3,068 m) through the alpine desert and into the upper moorland. A long, exhausting, triumphant day.
Overnight: Mweka Camp — 3,068 m / 10,065 ft
-
3,068 m to 1,640 m • 10 km • 3–4 hours • Rainforest
The final descent takes you through the montane rainforest that the Shira Route bypassed on Day 1 — dense tropical canopy, mossy trees, and birdsong. The trail is often muddy and slippery, so trekking poles and careful footing are essential. After approximately three to four hours, you reach Mweka Gate (1,640 m), where you sign out, receive your summit certificate, and tip your mountain crew. Your Duma Explorer vehicle will be waiting to transfer you back to your hotel in Moshi or Arusha.
End: Mweka Gate — 1,640 m / 5,380 ft
| Day | Highlights | Start Elevation | End Elevation | Gain / Loss | Distance | Overnight | Zone |
|---|---|---|---|---|---|---|---|
| Day 1 | Drive to Morum Barrier; short afternoon trek across moorland; gentle start for altitude adjustment | 3,414 m | 3,505 m | +91 m | 4 km | Shira 1 Camp | Moorland |
| Day 2 | Cross the Shira Plateau; Shira Cathedral rock formations; views of Kibo and Mount Meru; merge with Lemosho trail | 3,505 m | 3,847 m | +342 m | 6 km | Shira 2 Camp | Moorland |
| Day 3 | Climb to Lava Tower (4,630 m) for acclimatization; descend to Barranco through giant groundsels and glacier views | 3,847 m | 3,976 m | +783 m / −654 m | 11 km | Barranco Camp | Alpine Desert |
| Day 4 | Barranco Wall scramble (257 m); southern ice field views; ridge and valley traverse to Karanga | 3,976 m | 4,034 m | +58 m | 5 km | Karanga Camp | Alpine Desert |
| Day 5 | Steep climb to high camp; Rebmann, Kersten, and Decken glacier views; summit briefing and early dinner | 4,034 m | 4,673 m | +639 m | 4 km | Barafu Camp | Alpine Desert |
| Day 6 | Midnight summit push via Stella Point; sunrise on crater rim; Uhuru Peak (5,895 m); descend to Mweka Camp | 4,673 m | 3,068 m | +1,222 m / −2,827 m | 15.5 km | Mweka Camp | Arctic |
| Day 7 | Descent through montane rainforest to Mweka Gate; summit certificate and crew tipping ceremony | 3,068 m | 1,640 m | −1,428 m | 10 km | — | Rainforest |
Route Summary Table
Trail Conditions on the Shira Route
The Shira Route begins above the treeline, so the trail conditions differ from lower-starting routes. From Day 1, you are exposed to sun, wind, and the wide-open moorland of the Shira Plateau.
Shira Plateau (Days 1 & 2): Firm, rocky moorland paths across rolling terrain. The trail is well-defined but exposed — there is no tree cover for shade or wind protection. Volcanic rock formations and short scrubby vegetation line the route. Conditions are generally dry, but morning frost is common.
Lava Tower and Barranco (Day 3): The climb to Lava Tower crosses increasingly barren alpine desert. The descent to Barranco Camp is steep and rocky with some loose scree. The Barranco Valley can trap afternoon cloud and drizzle.
Barranco Wall (Day 4): The famous scramble is steep rock — hands and feet required, but no technical climbing skills needed. The rock is generally solid and well-worn from heavy foot traffic. Your guide will set the pace and identify handholds. After the wall, the trail undulates through ridges and valleys with rocky, uneven surfaces.
Barafu and summit push (Days 5 & 6): Barafu Camp sits on an exposed, windswept ridge. The summit push from Barafu is steep scree and loose gravel in the dark, followed by a snowfield traverse to Uhuru Peak. Temperatures drop to −15°C to −20°C with windchill. Your Duma Explorer guide sets a slow, deliberate pace (pole pole).
Mweka descent (Day 7): A steep descent through dense rainforest. The trail is often muddy and slippery — trekking poles are essential. Wooden steps and drainage channels have been installed in the worst sections.
Pricing, Inclusions & Exclusions
2026 Shira Route Pricing — Published and Transparent
All prices in USD per person. Prefer the full rainforest experience? Ask about our 8-Day Lemosho Route.
What's Included & What's Not
Included in Your Climb
- All Kilimanjaro National Park entrance and camping fees
- WFR-certified head guide with 7+ years of Kilimanjaro experience
- Assistant guides and porters
- Professional mountain cook
- All meals on the mountain (breakfast, lunch, dinner, and snacks)
- Filtered drinking water
- Four-season mountaineering tents
- Sleeping mats
- Private toilet tent
- Emergency oxygen cylinder and pulse oximeter
- Daily health monitoring and vitals checks
- 1:1 staff-to-climber ratio on summit night
- Round-trip hotel-to-trailhead transport (Moshi or Arusha)
- Post-climb summit certificate
Not Included
- International flights
- Tanzania visa (available on arrival, ~$50 USD)
- Travel and evacuation insurance (required)
- Personal hiking gear and clothing
- Sleeping bag and trekking poles (rental available)
- Tips for mountain crew (guidelines provided)
- Alcoholic and bottled beverages
- Pre- and post-climb hotel accommodation
- Meals in town
- Optional altitude medication (Diamox)
Frequently Asked Questions
-
The Shira Route is a western approach to Kilimanjaro that begins at Morum Barrier (3,414 m), bypassing the lower-elevation rainforest to start directly in the moorland zone. It crosses the spectacular Shira Plateau before merging with the Lemosho Route at Shira 2 Camp. From there, climbers follow the same scenic southern circuit to the summit. It is essentially a shorter version of the Lemosho Route that trades the first day's rainforest trek for extra time at altitude.
-
The Shira Route shares the same trail as Lemosho from Shira 2 Camp onward — the same camps, the same scenery, and the same southern circuit to the summit. The key difference is the start: Lemosho begins at 2,380 m and treks through montane rainforest for the first day, while Shira starts at 3,414 m at Morum Barrier, skipping the forest entirely. This saves a day but means climbers miss the rainforest experience and begin at higher altitude. Both routes offer excellent acclimatization profiles and the full beauty of the Shira Plateau, Lava Tower, Barranco Wall, and the southern glaciers.
-
The 7-day Shira Route has an industry wide summit success rate of approximately 85%, comparable to the Lemosho Route from Shira 2 Camp onward. The acclimatization profile is strong — the route includes a "climb high, sleep low" day via Lava Tower (4,630 m) and a gradual altitude build across the southern circuit. Duma Explorer enhances this with daily health monitoring, pulse oximetry, and emergency oxygen on every climb.
-
Starting at 3,414 m means you skip the gradual altitude build of the rainforest zone, which can make the first day feel more demanding. However, the first two days on the Shira Plateau are relatively gentle — short distances and moderate elevation gains — giving your body time to adjust before the route climbs higher. If you have prior experience at altitude or arrive in Tanzania a day or two early to acclimatize, the higher start is manageable. Duma Explorer monitors your vitals daily from Day 1 to catch any early signs of altitude sickness.
-
The Shira Route offers nearly all the same scenery as the Lemosho Route — the vast Shira Plateau, Shira Cathedral's volcanic rock formations, the Lava Tower, the dramatic Barranco Wall scramble, and up-close views of the southern glaciers (Rebmann, Kersten, and Decken). The one exception is the montane rainforest: because the route starts above the treeline, you miss the dense canopy, colobus monkeys, and tropical birdlife of Lemosho's first day. From Shira 2 Camp onward, the two routes are identical.
-
The recommended Shira Route itinerary is 7 days and 6 nights. This provides strong acclimatization with gradual altitude gains across the Shira Plateau before joining the Lemosho/Machame southern circuit. The route covers approximately 56 km (35 miles), making it one of the shorter approaches to the summit.
-
Because Shira starts above the treeline, you will be exposed to sun, wind, and cold from Day 1 — pack accordingly. Essential items include layered clothing (base layers, insulating mid-layers, waterproof shell), sturdy waterproof hiking boots, a warm sleeping bag rated to at least -10°C (14°F), a headlamp with spare batteries for summit night, trekking poles, and sun protection. Unlike the Marangu Route, Shira is a full camping route — your Duma Explorer team carries and sets up all tents, dining facilities, and toilet tents. You only carry a daypack. Refer to our detailed packing page for more information.
-
The best months are January–March and June–October, which offer the driest conditions and clearest summit views. Because the Shira Route starts above the rainforest, it is less affected by rainfall than lower-starting routes, but the southern circuit (Barranco to Barafu) can still see afternoon cloud and drizzle during shoulder seasons. June to October is peak season; January to March tends to be quieter with equally good conditions.
-
Choose Shira if you want the scenic beauty and strong acclimatization profile of the Lemosho Route but with one fewer day on the mountain. The Shira Route is ideal for climbers with limited time who still want the full western summit experience — the Shira Plateau, Lava Tower, Barranco Wall, and southern glacier views. Choose Lemosho instead if the rainforest experience is important to you or if you prefer the most gradual altitude build possible.
Your Shira Climb Starts here
Tell Stacy your dates, fitness level, and goals — she’ll match you with the right itinerary, build your crew, and handle every detail from trailhead to summit.