

Safari Photography Gear Guide 2026: 40+ Essential Terms
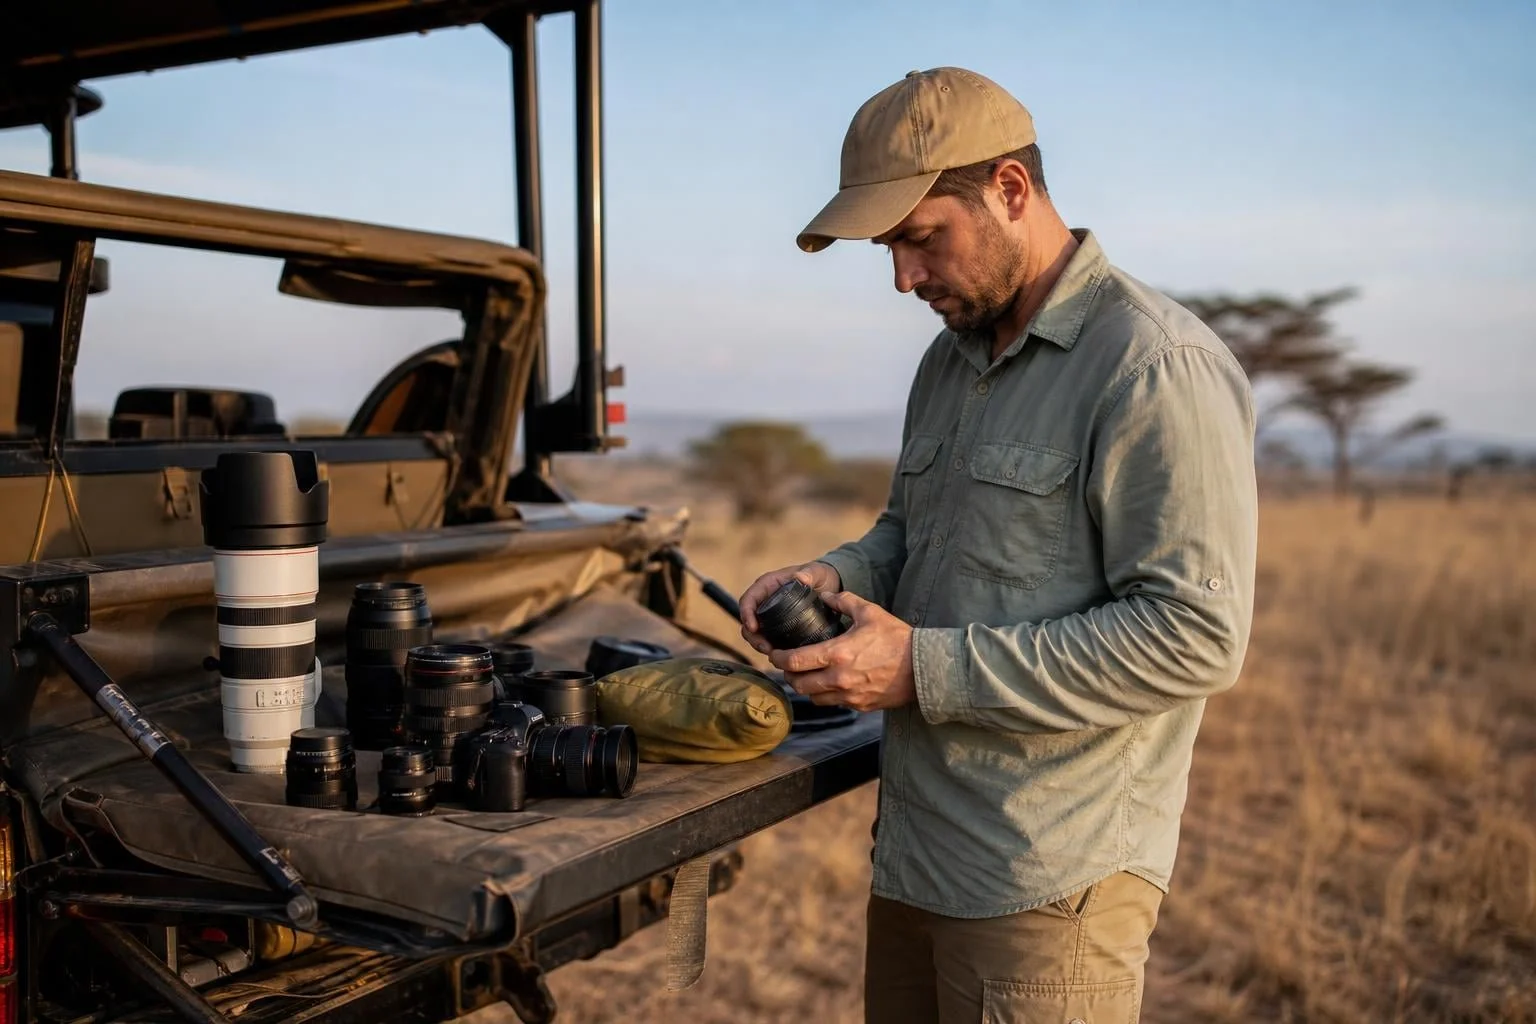
TL;DR
Safari photography gear includes everything from camera bodies and telephoto lenses to beanbags, dust covers, and memory cards. The most important gear decisions for an East African game drive involve choosing the right focal length (200mm minimum, 400mm+ preferred), proper camera support (beanbags, not tripods), and reliable dust protection. This glossary explains every term in plain language so first-time safari travelers can plan smarter and shoot better.
Most safari photography gear guides are written by photographers. They assume you already know what “crop factor” means or why a beanbag matters more than a tripod when you’re sitting in a Toyota Land Cruiser with a pop-top roof. This glossary is written from the opposite direction: from the perspective of what safari operators see guests bring, what actually works on the vehicle, and what terms you need to understand before your first game drive.
Whether you’re planning a Tanzania safari itinerary or researching what to pack for your first trip to the Serengeti, this reference will give you the vocabulary to make confident decisions about your photography kit.
You don’t need to be a professional photographer to bring home extraordinary images. You do need to understand the gear.
Quick Answer: What Safari Photography Gear Do You Actually Need? For most safari travelers, the essential photography kit is a camera with reliable autofocus, a 100-400mm or 200-600mm telephoto zoom, a wide-angle lens or second camera body, a beanbag for vehicle support, extra batteries, multiple memory cards, a portable SSD for backup, and basic dust and rain protection. A tripod is usually unnecessary on game drives. For wildlife, prioritize reach, autofocus, low-light performance, stabilization, and vehicle-friendly support over camera resolution. A 400mm-or-longer lens is particularly useful for distant animals and birds, while a 70-200mm or 100-400mm lens provides more flexibility when animals are closer. Bottom line: You do not need professional-level equipment to photograph wildlife on safari. A good telephoto zoom, stable beanbag support, sufficient storage, and dust protection will usually have a bigger practical impact than upgrading to the most expensive camera body.
Safari Photography Gear at a Glance
|
Gear |
Recommended for Safari |
Why It Matters |
Priority |
|---|---|---|---|
|
Camera body |
Mirrorless or DSLR |
Determines autofocus, image quality, battery life, and low-light performance |
Essential |
|
Telephoto lens |
100-400mm, 200-600mm, or similar |
Provides reach for distant wildlife |
Essential |
|
Wide-angle lens |
16-35mm, 20-70mm, 24-70mm, or similar |
Landscapes, camps, and environmental wildlife photos |
Useful |
|
Beanbag |
Vehicle-compatible |
Provides stable support without taking up much space |
Essential |
|
Second camera body |
Optional |
Reduces lens changes and protects against dust and equipment failure |
Recommended |
|
Extra batteries |
3-4+ |
Long game drives and limited charging opportunities |
Essential |
|
Memory cards |
256GB+ total |
Burst shooting can consume storage quickly |
Essential |
|
Portable SSD |
1TB+ |
Creates a second copy of photographs in the field |
Recommended |
|
Rocket blower |
Compact |
Removes loose dust without touching the lens |
Recommended |
|
Rain/dust cover |
Compact |
Protects gear from dust, rain, and spray |
Recommended |
|
Lens hood |
One per lens |
Reduces flare and protects the front element |
Recommended |
|
Tripod |
Usually unnecessary |
Difficult to use inside safari vehicles |
Usually Skip |
|
Monopod |
Situational |
More useful for walking safaris or fixed locations |
Optional |
|
Teleconverter |
Advanced users |
Extends reach at the cost of light and some image quality |
Optional |
What Safari Photography Gear Do You Really Need?
You do not need every item in this glossary. For most first-time safari travelers, a practical kit can be built around one camera body, one versatile telephoto zoom, one wide-to-standard lens, a beanbag, spare batteries, multiple memory cards, and a simple field-backup system.
Essential Safari Photography Gear
-
Camera body with reliable autofocus
-
100-400mm, 200-500mm, or 200-600mm telephoto zoom
-
Beanbag
-
Extra batteries
-
Multiple memory cards
-
Camera bag or protective insert
-
Rocket blower
-
Lens hood
-
Dust/rain protection
Recommended Upgrades
-
Second camera body
-
70-200mm f/2.8 or similar fast zoom
-
Portable SSD
-
Weather-sealed lenses
-
Extra-long telephoto lens
-
Teleconverter
Usually Optional
-
Tripod for game drives
-
Gimbal head
-
Monopod
-
Professional 500mm or 600mm prime
-
Large camera backpack
The goal is not to carry the most gear. It is to carry the gear you can use quickly, safely, and comfortably from a moving safari vehicle.
Safari Photography Gear by Trip Type
|
Safari Type |
Best Lens Strategy |
Camera Priority |
Support |
Key Consideration |
|---|---|---|---|---|
|
First-time Tanzania safari |
100-400mm or 200-600mm |
Reliable AF and good high-ISO performance |
Beanbag |
Versatility |
|
Serengeti wildlife |
100-500mm or 200-600mm |
Fast subject tracking |
Beanbag |
Long reach |
|
Bird photography |
400-600mm+ |
High burst rate and AF tracking |
Beanbag or vehicle mount |
Reach |
|
Tarangire elephants |
100-400mm |
Flexible framing |
Beanbag |
Animals can be relatively close |
|
Ngorongoro Crater |
100-500mm + wide angle |
Good low-light performance |
Beanbag |
Variable distances |
|
Gorilla trekking |
70-200mm f/2.8 |
High-ISO performance |
Handheld/monopod where permitted |
Weight and low light |
|
Walking safari |
70-200mm or similar |
Lightweight body |
Monopod optional |
Portability |
|
Photography lodge/hide |
100-400mm or longer |
High-quality AF |
Tripod/gimbal possible |
Fixed shooting position |
|
Astrophotography |
Wide-angle fast lens |
Low-noise high ISO |
Tripod |
Long exposures |
Camera Bodies: Choosing the Right Foundation
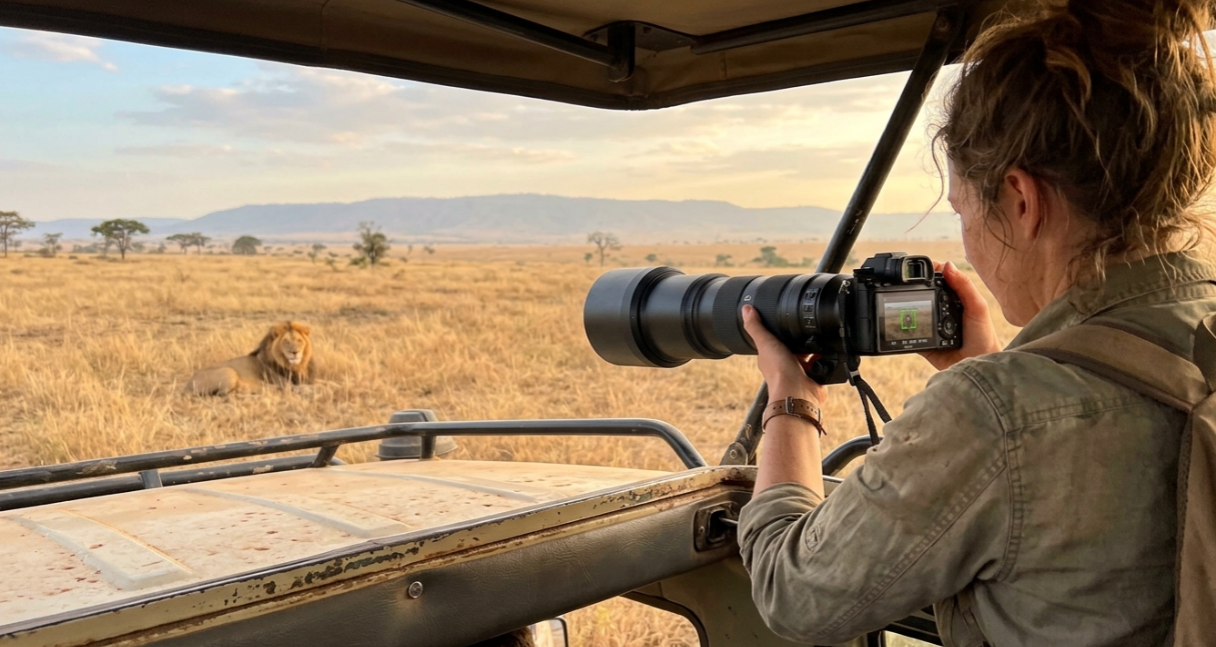
Your camera body is the starting point for every other safari photography gear decision. Three main types dominate the conversation.
DSLR (Digital Single-Lens Reflex)
A DSLR uses a mirror mechanism to reflect light from the lens into an optical viewfinder. When you press the shutter button, the mirror flips up so light can reach the sensor.
DSLRs ruled wildlife photography for decades. Their main advantage on safari is battery life, which is genuinely excellent. A single charge can last thousands of shots. The disadvantage in 2026: autofocus systems are a generation behind mirrorless cameras. If you already own a quality DSLR with good lenses, there’s no reason to abandon it. But if you’re buying new, mirrorless is the better investment.
Mirrorless Camera
Now the dominant recommendation for safari photography gear. A mirrorless camera removes the mirror entirely, using an electronic viewfinder instead. This design allows the autofocus system to cover nearly the entire sensor surface.
The autofocus advantage is not subtle. Modern mirrorless cameras from Canon, Sony, and Nikon use AI-driven processors to recognize and track animals, birds, and even specific features like eyes. Practitioners on photography forums describe mirrorless animal eye AF as a genuine revolution: one photographer reported that their mirrorless camera kept perfect focus on a leopard’s eye as it stalked prey, even when partially obscured by vegetation. DSLRs simply cannot match that level of intelligent tracking.
Bridge Camera
A bridge camera sits between a point-and-shoot and an interchangeable-lens camera. It’s easier to operate, lighter to carry, and typically includes a built-in superzoom lens. The Sony RX10 IV is the most frequently recommended bridge camera for safari, offering a 24-600mm equivalent zoom range in a single, relatively compact body.
Bridge cameras make sense for travelers who want good images without the complexity (or weight) of carrying multiple lenses. For family safaris where simplicity matters, they’re a strong choice.
Full-Frame Sensor
A full-frame sensor matches the size of traditional 35mm film (approximately 36mm x 24mm). Larger pixels capture more light, which means less noise and better detail at high ISO settings. This matters enormously during dawn and dusk game drives, when the light is low but the animals are most active.
Crop Sensor (APS-C)
An APS-C sensor is roughly two-thirds the size of a full-frame sensor. The field of view is multiplied by a factor of 1.5x to 1.6x compared to full frame. In practical terms, a 300mm lens on an APS-C body provides an effective field of view equivalent to 450mm on a full-frame camera.
This “crop factor” is highly advantageous for capturing distant animals. The trade-off is worse low-light performance compared to full frame. For many safari travelers, especially those on a budget, an APS-C body with a good telephoto lens delivers excellent results.
Micro Four Thirds
A smaller sensor format (roughly half the area of full frame) with a 2x crop factor. A 150mm lens becomes effectively 300mm. These systems are significantly lighter, which matters when you’re traveling with luggage weight limits on bush flights. The Olympus/OM System and Panasonic Lumix lines are the main options here.
Weather Sealing / Dust Sealing
A design feature that uses gaskets and seals around buttons, dials, and body joints to resist moisture and dust penetration. African safari roads generate relentless fine dust, particularly in the Serengeti and Tarangire, and even sealed roads kick up clouds of red powder that penetrates camera bags and settles on sensor surfaces. Dust-sealed bodies and lenses are strongly preferred for safari photography gear.
Which Camera Type Is Best for Safari?
|
Camera Type |
Best For |
Main Advantage |
Main Limitation |
|---|---|---|---|
|
Mirrorless |
Most travelers buying new |
Excellent autofocus and subject tracking |
Battery consumption can be higher |
|
DSLR |
Travelers who already own one |
Battery life and proven reliability |
Older AF/viewfinder technology |
|
APS-C mirrorless |
Travelers wanting reach and lower weight |
Crop factor and smaller systems |
Less low-light flexibility than some full-frame systems |
|
Full-frame mirrorless |
Serious wildlife photographers |
Low-light performance and advanced AF |
Higher cost and weight |
|
Micro Four Thirds |
Lightweight travel setups |
2x crop factor and compact lenses |
Smaller sensor |
|
Bridge camera |
Beginners and families |
Built-in superzoom and simplicity |
Smaller sensor and less flexibility |
Best choice for most first-time safari travelers: A modern mirrorless or APS-C camera paired with a quality telephoto zoom offers an excellent balance of autofocus, reach, image quality, weight, and ease of use.
Lenses: The Most Important Gear Decision
If you have to choose between spending money on a better camera body or a better lens, choose the lens. Every experienced safari photographer will tell you the same thing.
Focal Length
The distance (in millimeters) from the optical center of a lens to the sensor when focused at infinity. In plain language: the higher the number, the more you can “zoom in” on distant subjects.
For wildlife photography on safari, you want a lens that covers at least 70mm to 400mm. For bird photography, 500mm or 600mm is better. If you’re visiting Tanzania’s best parks, you’ll encounter everything from elephants at close range in Tarangire to distant lions on the Serengeti plains. Versatility in focal length matters more than most beginners expect.
Safari Lens Focal Length Cheat Sheet
|
Focal Length |
Best Use on Safari |
|---|---|
|
14-24mm |
Very wide landscapes and dramatic environmental scenes |
|
16-35mm |
Landscapes, camps, vehicle interiors |
|
24-70mm |
General photography and animals that are very close |
|
70-200mm |
Portraits, environmental wildlife, gorilla trekking |
|
100-400mm |
Versatile all-around safari wildlife lens |
|
100-500mm |
Flexible wildlife and landscape combination |
|
200-600mm |
Distant wildlife and birds |
|
400mm+ |
Serious wildlife and bird photography |
|
500-600mm |
Maximum reach for distant subjects |
For most first-time safari travelers, a 100-400mm, 100-500mm, or 200-600mm zoom provides the best combination of reach and flexibility.
Best Safari Lens Strategy by Budget
Budget Setup
Use an APS-C camera with a 70-300mm or 100-400mm telephoto zoom.
This keeps weight and cost manageable while still providing enough reach for many large animals and closer sightings.
Mid-Range Setup
Pair a modern mirrorless camera with a 100-400mm, 100-500mm, or similar telephoto zoom.
This is the sweet spot for many safari travelers because it provides useful reach without the weight and cost of professional super-telephoto primes.
Long-Reach Setup
Use a 200-600mm or 500-600mm lens when distant wildlife and birds are a major priority.
The additional reach is particularly valuable on open plains and for small or distant subjects.
Professional Setup
Professional wildlife photographers may use two bodies with lenses such as a 100-500mm and 500mm or 600mm prime.
The advantage is maximum reach, autofocus performance, low-light capability, and reduced lens swapping. The disadvantage is significantly greater weight, cost, and complexity.
Telephoto Lens
The workhorse of safari photography gear. Any lens with a focal length longer than about 70mm qualifies, but in the safari context, “telephoto” usually refers to lenses in the 100-600mm range.
The minimum recommended focal length for wildlife is 200-300mm. Super-telephotos of 400-600mm are obviously better in many situations. Professional wildlife photographer Isak Pretorius recommends combining a long lens (500mm or longer) for close-up details and birds with a medium zoom like a 70-200mm or 100-400mm, and then a wide-angle lens like a 24-70mm or 16-35mm.
Superzoom Lens
A zoom lens with an unusually large focal length range, designed to cover multiple shooting scenarios in a single lens. Popular safari options include the Canon RF 100-500mm, Sony 200-600mm, and Sigma 60-600mm.
Superzooms come with compromises. They’re not as fast (meaning their maximum aperture is smaller) as prime lenses, and they can be slightly less sharp at the extremes of their range. But the versatility matters more than most people think. Swapping lenses in a dusty safari vehicle is something you want to minimize.
Wide-Angle Lens
A lens with a short focal length (typically 14-35mm) that captures a broad field of view. Often overlooked in safari photography gear lists, but critical for landscape shots, camp photographs, and environmental wildlife images where you want to show the animal in its habitat.
You may want a camera that can also shoot at around 20mm to capture sweeping Serengeti grasslands or the Ngorongoro Crater rim at sunrise.
Prime Lens
A lens with a fixed focal length (no zoom). Primes are typically sharper and faster (wider maximum aperture) than zoom lenses at the same focal length. A 500mm f/4 prime is the dream lens for many wildlife photographers, but it’s also heavy, expensive, and inflexible. On safari, most travelers are better served by zoom lenses.
Zoom Lens
A lens with a variable focal length. You rotate the zoom ring to change the framing without physically moving. All superzoom and telephoto zoom lenses fall into this category. The ability to quickly reframe from a full-body shot to a tight portrait without changing lenses is extremely valuable during fast-moving wildlife encounters.
Aperture (f-stop)
The size of the opening in the lens that allows light to reach the sensor. Written as f/2.8, f/4, f/5.6, and so on. The confusing part: smaller numbers mean larger openings and more light. An f/2.8 lens gathers four times more light than an f/5.6 lens.
Aperture also controls depth of field. A wide aperture (f/2.8) creates a blurry background that isolates your subject. This is what gives professional wildlife photos that “the animal pops out of the frame” look.
Fast Glass
Photography slang for lenses with wide maximum apertures (f/2.8 or f/4). A faster lens can be a game-changer in early mornings or late evenings when light is limited. The term “fast” refers to the ability to use faster shutter speeds because more light enters the lens.
Fast glass is expensive and heavy. A 70-200mm f/2.8 weighs roughly twice as much as a 70-300mm f/4.5-5.6. The trade-off between speed, weight, and cost is one of the central tensions in assembling safari photography gear.
Teleconverter / Extender
A small optical adapter placed between the camera body and lens that multiplies the focal length. A 1.4x teleconverter turns a 300mm lens into a 420mm lens. A 2x teleconverter turns it into 600mm.
The cost: you lose light (one stop with a 1.4x, two stops with a 2x) and some sharpness. Teleconverters work best with high-quality prime lenses and are a popular way for professionals to extend a 300mm or 500mm prime without carrying a second massive telephoto.
Image Stabilization (IS / VR / IBIS)
Technology that compensates for camera shake, either in the lens or in the camera body. Canon calls it IS (Image Stabilization), Nikon calls it VR (Vibration Reduction), and in-body systems are called IBIS (In-Body Image Stabilization).
This matters hugely on safari. You’re shooting from a vehicle that may be vibrating from the engine, other passengers shifting position, or wind. Modern stabilization systems can compensate for several stops of shake, making the difference between a sharp image and a blurry one.
Camera Support and Stabilization
Here’s a fact that surprises many first-time safari travelers: the single most important piece of safari photography gear is not your camera or your lens. It’s your camera support. Without stable support, nothing else matters.
Beanbag (Photography Beanbag)
The essential camera support for safari vehicles. A beanbag is exactly what it sounds like: a fabric bag filled with beans, rice, or similar granular material. You drape it over a vehicle’s door frame, window sill, or roof rail, then rest your lens on it.
Beanbags conform to any surface, absorb vibration, and allow smooth panning. They’re simple, lightweight (you can pack them empty and fill them with rice after arrival), and extremely effective. In East Africa, where safari vehicles are typically Toyota Land Cruisers or minivans with pop-top roofs, beanbags are the standard support solution.
For a deeper look at safari vehicle types and how they affect your shooting setup, that context helps explain why beanbags are universally preferred.
Tripod (And Why You Probably Won’t Use One)
A three-legged camera support designed for maximum stability. On safari, tripods are essentially useless. You’re not allowed to exit the vehicle during game drives in most East African parks, and there’s no room to set up a tripod inside a Land Cruiser. One photographer on a DPReview forum put it memorably: “A tripod in a safari vehicle is as popular as flatulence in an elevator.”
Practitioners on Reddit confirm this. Multiple travelers report bringing a travel tripod on safari and never unpacking it once. The one exception is astrophotography at camp, if you want to photograph the Milky Way over the Serengeti.
Window Mount / Door Clamp
A rigid metal clamp that attaches to a vehicle’s door frame or window, providing a fixed mounting point for heavy telephoto lenses. Brands like Kirk, Eckla Eagle, and Camstedi are commonly discussed in photography forums.
Window mounts offer more stability than beanbags for very heavy lenses but are less flexible. You’re locked into one angle until you reposition the clamp. Most safari travelers find beanbags more practical, but serious bird photographers sometimes prefer the rigidity of a clamp.
Gimbal Head
A specialized tripod head that counterbalances a heavy telephoto lens, allowing it to pivot smoothly in any direction with minimal effort. Gimbal heads revolutionized wildlife photography by making it effortless to track moving animals with massive lenses.
On a standard game drive, you won’t use a gimbal head. But some photography-focused lodges provide gimbal setups in their hides and blinds, and if you’re spending time at a waterhole hide, a gimbal is transformative.
Monopod
A single-legged support. Lighter and more portable than a tripod, but still impractical inside a safari vehicle. Monopods occasionally help during walking safaris or gorilla trekking when you need quick, mobile stabilization.
Storage, Power, and Backup
Wildlife doesn’t wait for you to swap memory cards. Getting storage and power management right is boring but essential.
Memory Card Write Speed
How quickly your camera can transfer image data to the card, measured in megabytes per second (MB/s). Write speed matters more than storage capacity on safari. Things happen fast with wildlife, and opportunities last only seconds. If your card can’t keep up with your camera’s burst rate, the buffer fills and the camera freezes at the worst possible moment.
Look for cards rated at UHS-II or faster. SanDisk Extreme Pro and Lexar Professional are the most recommended brands among wildlife photographers.
CFexpress / SD Card
The two main memory card formats. Most newer mirrorless cameras use CFexpress Type B cards, which are significantly faster than SD cards. Many bodies have dual card slots (one CFexpress, one SD), allowing you to write backup copies simultaneously.
Burst Mode / Continuous Shooting (fps)
A shooting mode where the camera takes multiple frames per second for as long as you hold the shutter button. Measured in frames per second (fps). Critical for action moments like hunts, river crossings, and birds in flight.
A single lion hunt or wildebeest crossing can fill a 64GB card within minutes when shooting in burst mode. Bring significantly more memory card capacity than you think you need. Practitioners recommend at least 256GB of total storage for a two-week trip, spread across four to six cards from reputable brands.
RAW vs. JPEG
RAW files contain all the data captured by the sensor, with no in-camera processing. JPEG files are compressed and processed by the camera. RAW files are much larger (a single RAW from a 50-megapixel camera can exceed 50MB) but give you far more flexibility when editing.
For safari, shooting RAW is worth the extra storage. The light changes dramatically from dawn to midday to dusk, and RAW files let you recover shadow detail, adjust white balance, and correct exposure after the fact in ways JPEG simply can’t match.
Field Backup
The process of copying your photos to a second storage device while still on safari. The cardinal rule of safari photography: never start a new day of shooting with the previous day’s photos only on a single memory card.
In remote areas, internet access is often nonexistent, so cloud backup is not an option until you return to a city. A portable SSD (like a Samsung T7 or SanDisk Extreme) weighing just a few ounces provides reliable local backup. Copy your cards every evening.
Portable SSD
A small, solid-state external drive for field backup. Modern portable SSDs are pocket-sized, shock-resistant, and fast enough to transfer a full 128GB card in under ten minutes. This is the most weight-efficient insurance you can carry.
Battery Management
Most safari camps and lodges have charging facilities, but generators often run only at specific times of day (typically mornings and evenings). Many photographers prefer not to rely on camp power and travel with at least four batteries split between two camera bodies.
Charge every battery every evening, even partially depleted ones. Cold mornings and heavy burst shooting drain batteries faster than you’d expect.
If you’re weighing safari cost and budgeting, extra batteries and memory cards are among the cheapest investments that have the biggest impact on your photography.
Protection and Maintenance
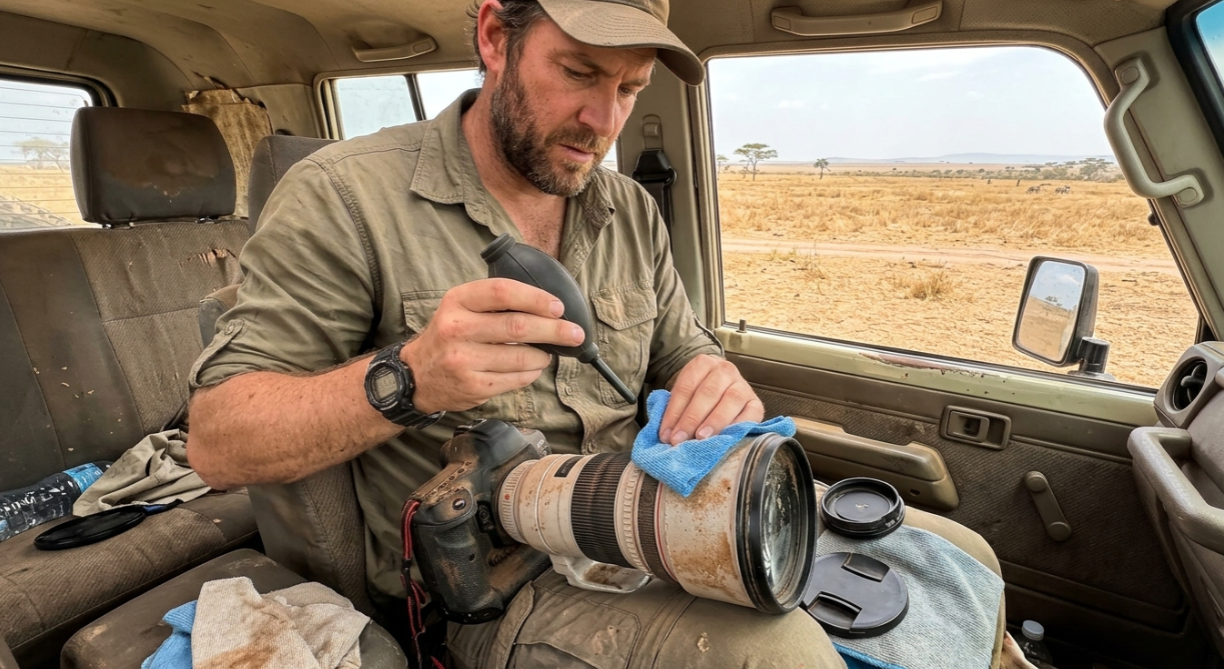
Dust is the enemy. Every forum thread, every gear guide, every safari operator will tell you the same thing. Dust management is non-negotiable in your safari photography gear kit.
Dust Cover / Rain Cover
A fabric or nylon sleeve that fits over your camera and lens to protect them from dust and rain. On safari, dust covers serve double duty: protecting from the red African dust that coats everything during dry-season game drives, and from occasional afternoon rain showers.
A practical tip from experienced safari travelers: an old pillowcase draped over your camera and lens works surprisingly well as a dust cover when you’re between sightings.
Why Two Camera Bodies Matter for Dust
Having two camera bodies isn’t just about convenience. It’s a dust-management strategy. Swapping lenses in the field exposes your sensor to Africa’s fine, penetrating dust. If you carry two bodies, each with a different lens (say a 100-400mm on one and a 24-70mm on the other), you eliminate most lens changes entirely.
Rocket Blower
A hand-powered air blower shaped like a rocket or bulb. The first line of defense against dust on your front lens element. A few puffs before shooting removes loose particles without touching (and potentially scratching) the glass. Carry one in an accessible pocket, not buried in your bag.
Sensor Cleaning Kit
Specialized swabs and solution for removing dust that accumulates on the camera sensor. Sensor dust shows up as dark spots in your images, most visible in shots with blue sky or smooth backgrounds. Bring a kit, but be cautious: sensor cleaning in a dusty camp environment can introduce more problems than it solves. Many photographers wait until they return home for thorough sensor cleaning.
Lens Hood
A plastic or metal shade that attaches to the front of a lens, blocking stray light that can cause flare and reducing contrast. On safari, lens hoods also provide physical protection for the front element against bumps, branches, and accidental contact.
UV / Protective Filter
A clear glass filter screwed onto the front of a lens. Its primary purpose on safari is physical protection. If a branch scrapes the front of your lens or dust scratches the surface, you’d rather replace a $30 filter than a $300 front element.
Some photographers argue that adding glass in front of the lens degrades image quality slightly. The practical reality is that the protection is worth it in safari conditions.
Silica Gel Packets
Small packets of moisture-absorbing material placed inside your camera bag. In humid environments near lakes and forests (Ngorongoro Crater, Lake Manyara, Bwindi Impenetrable Forest during gorilla trekking), condensation can form on and inside your gear overnight. Silica gel packets absorb that moisture and keep your equipment dry.
Safari-Specific Terms
These terms connect your safari photography gear to the actual conditions you’ll face in East Africa. This is where an operator’s perspective adds something a gear reviewer simply can’t provide.
Game Drive (Photography Context)
A guided excursion in a safari vehicle through a wildlife area. Game drives typically happen in the early morning (6:00-10:00 AM) and late afternoon (3:30-6:30 PM), when animals are most active and the light is best for photography. Midday game drives are possible but the harsh overhead light produces flat, unflattering images.
Knowing the best time for safari directly affects what light conditions you’ll encounter and, by extension, what gear choices make sense.
Golden Hour / Blue Hour
Golden hour is the period shortly after sunrise and before sunset when sunlight is warm, soft, and directional. Blue hour is the period just before sunrise and after sunset when the sky takes on deep blue tones. Both produce the most dramatic safari photographs.
In East Africa near the equator, golden hour is shorter than in temperate latitudes. Sunrise and sunset happen fast, so you need to be in position with your gear ready.
Pop-Top Vehicle
The standard safari vehicle in East Africa, typically a Toyota Land Cruiser or minivan with a roof that pops up to allow passengers to stand and shoot in all directions. The pop-top frame provides natural resting points for beanbags and gives 360-degree shooting access.
The vehicle you’re in shapes your photography more than most travelers realize. Pop-top Land Cruisers offer excellent flexibility. Open-sided 4x4s (common in southern Africa) provide unobstructed views but no roof to rest a beanbag on. For a full breakdown, see this guide to safari vehicle types and features.
Private Vehicle vs. Shared Vehicle
A private vehicle means your group has the vehicle and guide to yourselves. You decide when to wait at a sighting, when to move on, and how to position for the best light. The difference between good and unforgettable images often comes down to this single factor.
In a shared vehicle, you’re compromising with other guests who may not share your patience for waiting 45 minutes until a leopard descends from a tree. For anyone serious about photography, a private vehicle is the strongest recommendation an operator can make.
Understanding the costs and trade-offs of private vs. group safaris helps you make this decision with clear eyes.
Photography Safari vs. Standard Safari
A photography safari is specifically designed around capturing images. This means fewer guests per vehicle (so everyone gets a window seat and a clean angle), dedicated beanbags and camera mounts, longer time at sightings, and guides who understand photography concepts like backlighting and composition.
Some luxury lodges offer photography-specific vehicles, editing space, charging stations, and access to sunken hides at waterholes. These lodges cater to serious photographers and can transform a good safari into an exceptional one.
Hide / Blind
A concealed structure (often at ground level or partially underground) positioned near a waterhole, salt lick, or feeding station. Hides allow photographers to shoot at eye level with wildlife, producing intimate, dramatic images impossible to achieve from a vehicle.
Time spent in a hide is where gimbal heads and tripods actually become useful, since you’re in a fixed location with plenty of room.
Engine Vibration
A detail many gear guides miss entirely. Even with image stabilization active, engine vibration from an idling vehicle can ruin your images. When you settle into a sighting and prepare to shoot, ask your guide to turn off the engine.
One practitioner on DPReview confirmed this bluntly: “Taking photographs with the engine running is a disaster, even at high shutter speeds and with IS.” Good safari guides know to kill the engine at important sightings without being asked.
Camera Settings: Quick-Reference Definitions
Understanding these terms helps you translate your safari photography gear knowledge into actual settings when the moment arrives.
Shutter Speed
How long the camera’s sensor is exposed to light, measured in fractions of a second. A useful rule of thumb: set your shutter speed to at least twice your focal length. If you’re shooting at 400mm, you want a minimum of 1/800th of a second to avoid motion blur from camera shake.
For moving animals (running, flying, fighting), go faster: 1/2000th or higher. For stationary subjects in good light, you can drop lower and let more light hit the sensor.
Aperture Priority Mode
The most recommended shooting mode for safari. You set the aperture (controlling depth of field and light), and the camera automatically selects the appropriate shutter speed. This gives you creative control without the risk of missing a shot because you were fumbling with manual settings.
ISO
A measure of the sensor’s sensitivity to light. Low ISO (100-400) produces clean, noise-free images but requires more light. High ISO (3200-12800+) allows shooting in dim conditions but introduces noise (grain).
On early morning and late evening game drives, you’ll push ISO higher than feels comfortable. Modern cameras handle high ISO remarkably well. A slightly noisy sharp image is always better than a clean blurry one.
Animal Eye AF / Subject Detection
The feature that makes modern mirrorless cameras so dominant for wildlife photography. Using on-sensor phase-detection autofocus combined with AI processors, the camera recognizes and tracks animal faces, eyes, birds, and even specific species in real time. You simply point the camera, and the system locks focus on the nearest eye.
This technology has genuinely changed what’s possible for non-professional photographers on safari. Where focus accuracy once required years of skill development, the camera now handles the hardest part.
Rule of Thirds (Composition Basic)
A compositional guideline: imagine your frame divided into a 3x3 grid. Placing your subject at one of the four intersections (rather than dead center) generally produces more dynamic, visually interesting images. Most cameras can display this grid in the viewfinder.
Gorilla Trekking: A Different Gear Scenario
Everything above assumes open-vehicle game drives on savannas with long sight lines and good light. Gorilla trekking in Uganda and Rwanda is the opposite, and your safari photography gear needs shift dramatically.
Dense equatorial forest means extremely low light. The canopy blocks most sunlight, and you’re shooting in conditions closer to a dimly lit room than an open plain. Fast lenses (f/2.8) are strongly preferred. The 70-200mm f/2.8 is the consensus lens for gorilla trekking because of the constant low-light situations.
Focal length requirements are shorter. You’ll be within 7-10 meters of the gorillas (park rules set a minimum distance), so 200mm is more than enough reach. A 70-200mm covers the range from environmental group shots to tight portraits.
Weight matters more. You’re hiking through steep, muddy jungle terrain for one to six hours to reach a gorilla family. Every gram of gear you carry affects your energy and your ability to hold the camera steady when you arrive. Leave the 500mm prime at the lodge.
For a complete breakdown of settings, rules, and recommended equipment, the gorilla trekking photography guide covers this niche in depth.
Packing Your Safari Photography Gear: Practical Considerations
A brief note on logistics, because the best gear in the world is useless if it doesn’t make it onto the vehicle.
Camera bag for safari: Use a bag you can access quickly without standing up. A shoulder bag or soft insert that sits on the seat next to you works better than a backpack buried behind your row. You need to be able to swap lenses (when unavoidable), grab a second body, or reach a battery in seconds.
Bush flight weight limits: Internal flights to remote airstrips in the Serengeti or Ruaha typically restrict luggage to 15-20kg in soft bags. Your camera gear counts toward this limit. Plan accordingly: carry cameras and lenses in your hand luggage and check non-essential clothing.
Insurance: Camera gear is expensive and exposed to harsh conditions. Make sure your travel insurance covers equipment loss, damage, and theft. Some policies exclude “adventure activities,” which could theoretically include safari. Read the fine print.
For a complete checklist beyond photography gear, the Tanzania safari packing list covers clothing, medications, and everything else you need.
Frequently Asked Questions
What is the most important piece of safari photography gear?
A beanbag. It sounds unglamorous compared to choosing cameras and lenses, but without proper camera support, nothing else works properly. Beanbags are simple, lightweight, packable, and perfectly suited to the door frames and roof rails of East African safari vehicles.
Do I need a full-frame camera for safari photography?
No. A crop-sensor (APS-C) camera with a good telephoto lens produces excellent safari images. The 1.5x crop factor actually helps by giving you extra reach. Full-frame cameras perform better in low light, which matters at dawn and dusk, but they’re not a requirement for great results.
What focal length lens should I bring on safari?
At minimum, 200-300mm. Ideally, 400mm or longer. A superzoom like the Sony 200-600mm or Canon RF 100-500mm covers most safari scenarios in a single lens. If you photograph birds, stretching to 500-600mm is worth it.
Should I bring a tripod on safari?
Almost certainly not. You can’t exit the vehicle during game drives in most East African parks, and there’s no space for a tripod inside. A beanbag does the same job better. The only exception is if you plan to photograph stars at camp.
How many memory cards should I bring?
At least four to six cards of 64GB or 128GB each, for a minimum of 256GB total. Burst shooting during action sequences burns through storage fast. Use reputable brands (SanDisk Extreme Pro, Lexar Professional) and prioritize cards with high write speeds.
How do I protect my camera from dust on safari?
Use dust covers or even an old pillowcase when the camera is not in use. Carry a rocket blower for quick cleaning. Minimize lens changes (bring two camera bodies if possible). Store gear in sealed bags within your camera bag, and add silica gel packets in humid areas.
Is safari photography gear different for gorilla trekking?
Yes, significantly. Gorilla trekking requires shorter focal lengths (70-200mm), faster lenses (f/2.8 for low jungle light), and lighter overall weight since you’re hiking through steep terrain. It’s essentially the opposite gear profile from a savanna game drive.
What camera settings should I use on a game drive?
Start with Aperture Priority mode, set your aperture to the widest your lens allows (f/4 or f/5.6 for most zoom lenses), and let the camera manage shutter speed. Keep ISO on auto with a minimum shutter speed of 1/800th or faster. Enable burst mode and animal eye AF if your camera has it.
What to Do Next
Understanding safari photography gear is one step in planning a trip. The next steps are choosing where to go, when to go, and how to structure your itinerary so you’re in the right place at the right time for the images you want to capture.
Ready to start planning? Explore Tanzania safari itineraries, costs, and logistics to see how the pieces fit together, or check out the East Africa packing list for a complete overview of everything beyond the camera bag.